Saturday, February 19, 2011

MaquetteProject- entry 12


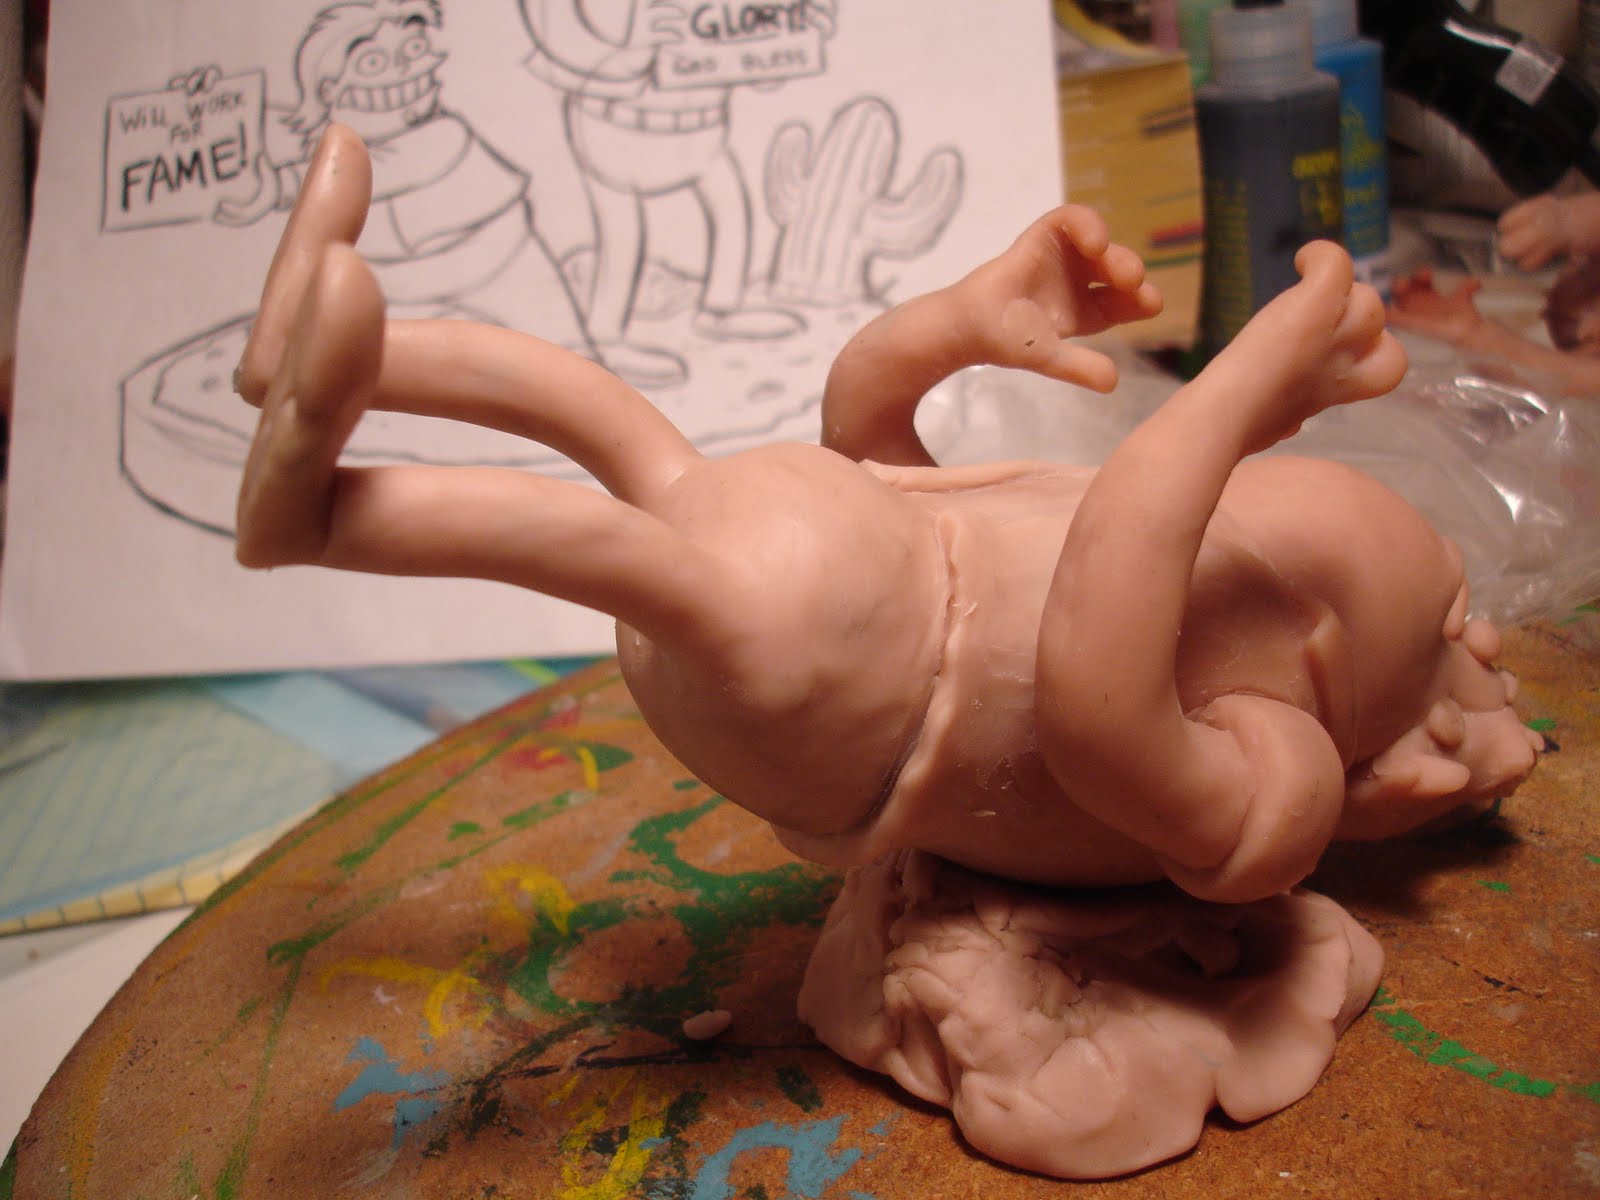
Almost finished! I hope you aren't bored with this project- because I am. The only thing left now is just refining the details and sharpening up lines and stuff. I use dental instruments to tighten up details like around eyes and in between folds in clothes or skin... areas where I just can't reach with sandpaper. Sometimes I'll cut an orange stick in half the long way and make my own sanding sticks to smooth tight areas.


I mark high spots that I want to sand down with a Sharpie or lead pencil. I mark right on the sculpt- it doesn't matter since I'm gonna sand it down until the mark doesn't show anymore. I usually circle shallow spots and then fill them up with putty- then sand those spots smooth too.


The base the characters are on is pretty simple- sand dirt and rocks with a small cactus. But I still need to do it in Erick's style. I followed the drawing again while tweaking a few things so they would work better in 3 dimensions.


I pressed the characters' feet into the sculpey a little so they'll set nice on the base after it's baked. Later I'll put some posts into the base for the 2 maquettes to rest on so they don't fly off when you move the piece.


I placed this base on foil so when I bake it inside my Pyrex pan, it'll be easy to get out and won't stick to the glass. The foil will peel right off and the slab will be nice and flat!
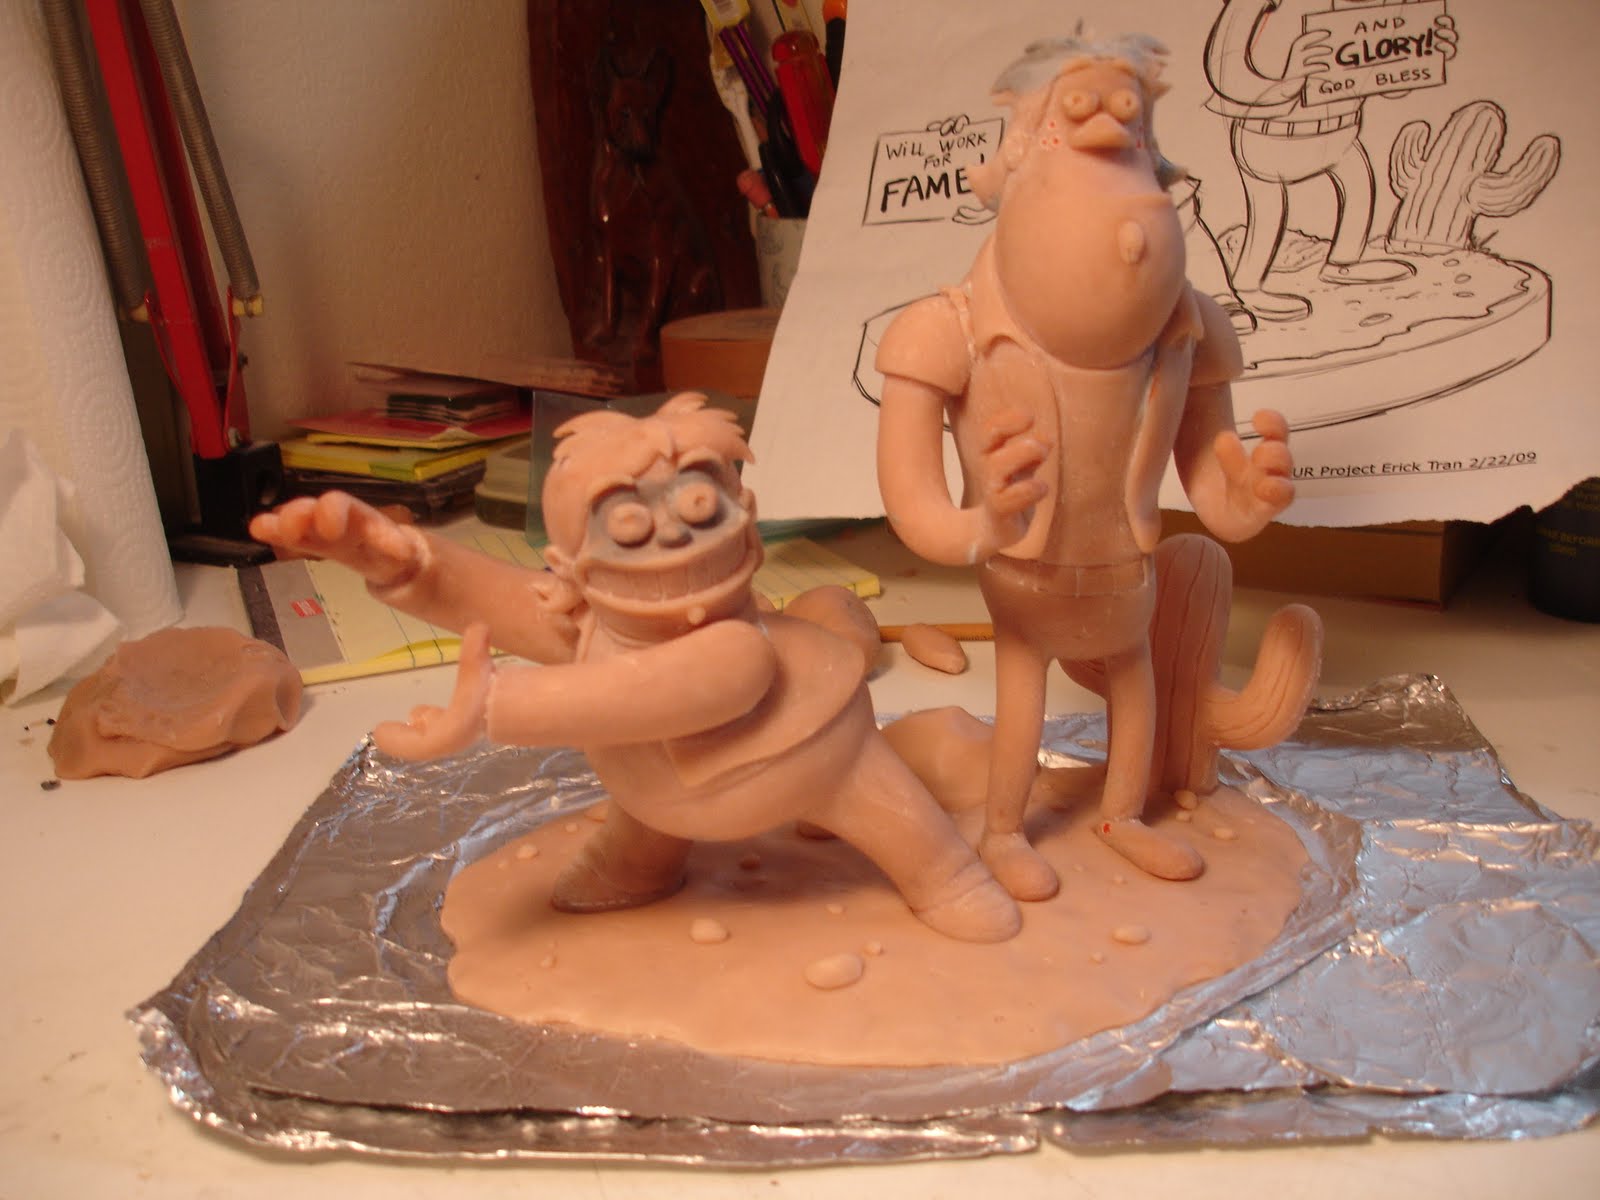


Test run.


Ta-da! All primed in primer gray and ready for some color.


VIDEO ENTRY 12_A


VIDEO ENTRY 12-B


VIDEO ENTRY 12-C

VIDEO ENTRY 12-D

Until next time...!

Sunday, December 5, 2010

MaquetteProject- entry 11


Hey everyone! Hope you had a great Thanksgiving like I did! Sorry I haven't updated earlier but I got carried away with other projects and work and family stuff and you know...

I baked the upper portion of the tall guy and after showing Erick about some edits, I started finalizing the bottom half of his body and his tiny legs.


The legs should be able to hold his weight with the help of the armature wires in them, after they are baked that is...


Also finished his vest, along with his pants and belt.


I did some finishing touches on his face and hair since I had another baking session. His freckles I plan on etching into the baked sculpting with a needle tool. They are so subtle and I just feel like if I tried sculpting them into the soft material I would just end up thinking they were too heavy anyway and filling them in and trying again...!


...almost done!

VIDEO ENTRY 11-A


VIDEO ENTRY 11-B

...Later!

Saturday, October 16, 2010

MaquetteProject- entry 10


Hey y'all...! Building up the taller guy and roughing out his details this time around.


As before, I used simple shapes to start out with and keep refining them until they look like the sketch. I kept comparing everything to the sketch to keep the scale and size relations right.


This guy looks like he's really heavy, but remember his torso is full of tinfoil, so he' not really heavy. I had to keep him light because of his skinny legs!


DROP AND GIMME TWENTY!!


Hooks for hands... patience... they'll come around...


Gettin' there... still pretty rough but you can tell it'll look like him. Man, his jaw is big!


I roughed in the hands and put a temporary sign in them to see if I was on the right track. You kind of have to keep everything in mind while you are sculpting a project like this with added props. The hands may look really good, but will they hold the sign after you bake the thing?


You may have noticed that the legs were roughed in and now they are not! This is because in the process of sculpting him, I kept squishing the legs out of proportion, so I decided to bake the top half first and them sculpt the lower half after, just like I did with the shorter character.


VIDEO ENTRY 10

See you next time! Almost done!

Sunday, October 3, 2010

MaquetteProject- entry 9


Greetings fellow earthlings.

With the 1st sculpt baked, the only stage left is to finish him off by sanding and detailing. I use alot of different tools for detailing, like sandpapers and dental cleaning tools. Sometimes it's a tough job getting every surface and curve and plane really smooth. And you can't cheat! Once you paint the the thing, all the rough spots show. So I try to get everything as smooth as I can.


Some things I left a bit rough since I knew it would be easy to sand smooth after the sculpt was baked again, like some of the lines and hems on his clothes and sneakers.


Sometimes I use plumbers putty to fill gaps and cracks that show up. You can see one of those places around his eye where the sculpey was a little shallow The putty is pretty easy to use, but you only have about 3 to 4 minutes before it sets up and hardens. It sands pretty well too.


VIDEO ENTRY 9-A

VIDEO ENTRY 9-B

Until next time friends!