Hey y'all...! Building up the taller guy and roughing out his details this time around.

As before, I used simple shapes to start out with and keep refining them until they look like the sketch. I kept comparing everything to the sketch to keep the scale and size relations right.


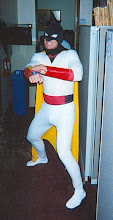
This guy looks like he's really heavy, but remember his torso is full of tinfoil, so he' not really heavy. I had to keep him light because of his skinny legs!


DROP AND GIMME TWENTY!!

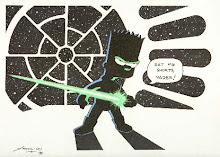
Hooks for hands... patience... they'll come around...


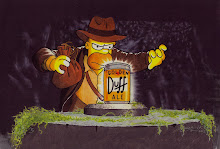
Gettin' there... still pretty rough but you can tell it'll look like him. Man, his jaw is big!


I roughed in the hands and put a temporary sign in them to see if I was on the right track. You kind of have to keep everything in mind while you are sculpting a project like this with added props. The hands may look really good, but will they hold the sign after you bake the thing?


You may have noticed that the legs were roughed in and now they are not! This is because in the process of sculpting him, I kept squishing the legs out of proportion, so I decided to bake the top half first and them sculpt the lower half after, just like I did with the shorter character.


VIDEO ENTRY 10

As before, I used simple shapes to start out with and keep refining them until they look like the sketch. I kept comparing everything to the sketch to keep the scale and size relations right.


This guy looks like he's really heavy, but remember his torso is full of tinfoil, so he' not really heavy. I had to keep him light because of his skinny legs!


DROP AND GIMME TWENTY!!

Hooks for hands... patience... they'll come around...


Gettin' there... still pretty rough but you can tell it'll look like him. Man, his jaw is big!


I roughed in the hands and put a temporary sign in them to see if I was on the right track. You kind of have to keep everything in mind while you are sculpting a project like this with added props. The hands may look really good, but will they hold the sign after you bake the thing?


You may have noticed that the legs were roughed in and now they are not! This is because in the process of sculpting him, I kept squishing the legs out of proportion, so I decided to bake the top half first and them sculpt the lower half after, just like I did with the shorter character.


VIDEO ENTRY 10
See you next time! Almost done!